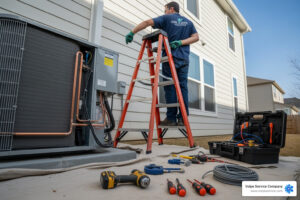
Understanding the AC Installation Process
The AC installation process involves several critical steps to ensure your cooling system operates efficiently and safely. The process is more complex than many homeowners realize, involving everything from old equipment removal and refrigerant handling to precise electrical work and system testing.
Here are the main stages of professional AC installation:
- Pre-installation assessment – Load calculations, system sizing, and home preparation
- Old system removal – EPA-certified refrigerant recovery and safe disposal
- New equipment installation – Placing outdoor condenser and indoor evaporator units
- System connections – Refrigerant lines, electrical wiring, and condensate drains
- Vacuum and charging – Removing contaminants and adding proper refrigerant levels
- Testing and commissioning – Verifying proper operation and performance
- Final walkthrough – System demonstration and maintenance instructions
A typical residential AC installation takes 4 to 8 hours, depending on the project’s complexity and any necessary ductwork modifications.
Why professional installation matters: Professional installation is crucial. Modern air conditioners are more complex than older models and require specialized knowledge of electrical codes, refrigerant handling, and system balancing. Cutting corners leads to higher energy costs and reduced comfort over the system’s life.
It’s far more than a simple equipment swap. Each step demands expertise, from EPA-certified refrigerant handling to proper brazing techniques that prevent leaks and system failure.

Before the Big Day: Planning Your AC Installation
Proper planning before your new air conditioner arrives is key to a successful installation and decades of comfort. Making informed choices about your system and home preparation ensures the AC installation process is smooth and that your investment is perfectly matched to your needs.
Key Factors in the AC Installation Process
Choosing the right AC system depends on your home’s unique size, layout, and infrastructure. What works for a neighbor might not be right for you.
| System Type | Best For | Pros | Cons |
|---|---|---|---|
| Central AC | Homes with existing ductwork | Whole-home cooling, quiet operation | Requires ductwork, higher upfront cost |
| Ductless Mini-Splits | Homes without ducts, room additions | Energy efficient, zoned cooling | Multiple indoor units, higher cost per room |
| Packaged Units | Limited indoor space, commercial use | All components in one unit | Less common for residential, outdoor placement required |
Central air conditioning systems are the standard for homes with existing ductwork, providing consistent, whole-home cooling.
Ductless mini-split systems offer flexibility for homes without ducts or for room additions. They provide energy-efficient zoned cooling, allowing you to control temperatures in individual rooms.
Packaged units contain all components in one outdoor unit. They are a great solution when indoor space is limited.
During your consultation, we consider your home’s square footage, ductwork condition, budget, and New Jersey’s climate demands to recommend a system customized for your situation.
For additional guidance on making the right choice, check out our 4 Tips for Quality Air Conditioning Installation.
Sizing Your Unit Correctly: The Manual J Load Calculation
Guesswork doesn’t work when sizing an AC unit. Professional HVAC contractors use a Manual J load calculation, a detailed assessment of your home’s specific cooling needs, to determine the correct size.

Getting the size wrong creates expensive problems. An undersized system will run constantly, struggling to cool your home and driving up electric bills. An oversized system cools too quickly, failing to remove humidity and leaving the air feeling sticky. This rapid cycling also causes premature wear on components.
Our Manual J calculation considers your home’s insulation, windows, ceiling height, number of occupants, and even heat-generating appliances. We also factor in New Jersey’s climate and your home’s orientation to the sun.
This scientific approach, following standards from the Air Conditioning Contractors of America, ensures your new system is a perfect match for your home.
Choosing an Efficient System: Understanding SEER Ratings and Modern Features
With the right size determined, the next step is efficiency. The SEER (Seasonal Energy Efficiency Ratio) rating is key, measuring cooling output versus energy consumed. Higher numbers mean better efficiency and lower operating costs.
While federal law requires minimum SEER ratings, investing in higher-efficiency models can cut cooling costs by 20-50% compared to older systems.
Modern air conditioners also offer advanced features:
- Smart thermostats learn your habits and allow remote control, automatically adjusting for optimal comfort and efficiency.
- Variable-speed compressors adjust their output to precisely match your home’s cooling needs, resulting in more consistent temperatures, better humidity control, and lower energy use.
- Noise reduction technology ensures today’s systems run whisper-quiet.
- Advanced air filtration and humidity control create a healthier and more comfortable indoor environment.
Our team helps you find the sweet spot between upfront investment and long-term savings. For new homeowners, our AC Installation Checklist for New Homeowner provides additional guidance.
Preparing Your Home and Ductwork
Finally, preparing your home for installation day can speed up the AC installation process and ensure it goes smoothly.

Ductwork inspection is crucial. Leaky ducts can waste up to 30% of your cooled air. We check for leaks, blockages, and proper sizing to ensure your new system performs at its peak.
Choosing the right locations for your indoor and outdoor units is a balance of efficiency, aesthetics, and practicality. The outdoor condenser needs a level surface with good airflow, while the indoor unit needs accessible space for installation and maintenance.
Clearing the installation area of obstacles helps our team work safely and efficiently. We handle all necessary permits to ensure your installation meets local codes without any delays.
For comprehensive preparation guidance, review our detailed guide on How to Prepare Your Home for a New HVAC System.
The Central AC Installation Process: A Step-by-Step Breakdown
Here we detail the technical steps professionals take on installation day, from removing the old system to bringing the new one online. This is where you’ll appreciate having experienced professionals handle your AC installation process!
Step 1: Removal of the Old System and Refrigerant
When replacing a system, the first step is to safely remove the old equipment according to strict safety and environmental protocols. The most critical part is refrigerant recovery. It’s illegal to vent refrigerants under EPA standards. Our EPA-certified technicians use specialized machines to safely extract and handle the refrigerant.
We then perform the electrical disconnect following National Electrical Code guidelines. We often replace the old service disconnect and wiring to give your new system a fresh, safe start. Finally, we physically remove the old units, protecting your home throughout the process.
Step 2: Installing the New Outdoor and Indoor Units
Next, we install the new cooling system. Precision placement is critical for efficiency and system longevity.

Your outdoor condenser is placed on a new, durable composite pad that won’t crack or shift. The pad must be perfectly level with plenty of clearance for airflow. Modern AC units are often larger than older ones, sometimes requiring a new location.
The indoor evaporator coil is typically installed above your furnace. We prefer cased coils in insulated cabinets for easier installation and service. Proper spacing between the coil and furnace is crucial to prevent issues like melted drain pans.
Our team ensures both units are positioned for optimal performance and easy future maintenance. You can see more details in our AC Installation Step-by-Step Guide.
Step 3: Connecting the System Components
This step brings all the pieces together into one efficient system.
- Refrigerant lines are copper pipes connecting the indoor and outdoor units. We often recommend replacing old lines to avoid contamination from incompatible oils or corrosion, which could damage the new system.
- When connecting lines, we use brazing with nitrogen. This process prevents internal oxidation during brazing, which would otherwise create contaminants that can cause expensive damage.
- Electrical wiring is done to strict National Electrical Code standards for both high-voltage power and low-voltage thermostat controls, ensuring safety.
- The condensate drain line is installed with the proper slope to remove humidity. We include a trap to block odors and a safety overflow switch to prevent water damage by shutting the system down if a clog occurs.
- A liquid line filter dryer is installed to protect the compressor from moisture and contaminants.
Step 4: The Vacuum Process and System Charging
These final, precise technical steps ensure your system operates flawlessly for years.
First, the vacuum process removes all air and moisture from the refrigerant lines. This is critical because moisture can mix with refrigerant to form corrosive acids that damage internal components. We use a micron gauge to verify the system reaches and holds a deep vacuum (500 microns or less), confirming it is clean and leak-free.
Only then do we begin system charging. We add the exact amount of refrigerant specified by the manufacturer. Incorrect levels hurt performance and efficiency, so we measure parameters like superheat and subcooling to ensure a perfect charge.
This attention to detail during the AC installation process is what separates professional installation from shortcuts that cost you money and comfort later.
After the Installation: Final Checks and First Use
The AC installation process isn’t complete until we’ve thoroughly tested your new system and ensured you’re comfortable using it. We stick around to ensure everything is perfect, which is what separates a professional installation from a rushed job.
System Testing and Commissioning
During startup commissioning, we run a series of tests to verify performance and ensure your new AC system is working correctly, laying the groundwork for years of reliable cooling.
- Airflow verification: We check for free and even airflow through your ducts and registers, identifying any hidden issues.
- Temperature differential: We measure the temperature drop across the system to confirm it’s cooling effectively and meets manufacturer specifications.
- Final leak checks: We use sensitive electronic detectors to find even the smallest refrigerant leaks.
- Thermostat verification: We test all functions to ensure your thermostat is communicating correctly with the system.
- Baseline data collection: We record baseline operational data (pressures, temperatures, fan speeds) for future service calls. This data-driven step, often skipped by others, is essential for quick diagnostics and guaranteed long-term performance.
For more insights into why professional installation makes such a difference, take a look at our guide on Professional AC Installation Benefits.
Cleanup and Homeowner Walkthrough
After confirming perfect operation, we take the final steps to ensure you’re satisfied and ready to enjoy your new system.
Thorough cleanup is a priority. We take our commitment to leaving your home cleaner than we found it seriously. Our team removes all debris, protects your property, and safely disposes of your old AC equipment.
The homeowner walkthrough is where our technician explains your new system’s operation and features, answering all your questions so you feel confident using it. We’ll provide a detailed maintenance schedule, explaining the importance of regular tune-ups and filter changes.
Finally, we’ll review your warranty information and provide all necessary documentation. Our professional and honest approach means you’ll be fully informed and comfortable with your new cooling system. For additional insights, check out our comprehensive guide with AC Installation Tips Every Homeowner Must Know.
Frequently Asked Questions about AC Installation
We love chatting with homeowners about their cooling needs. Here are answers to some of the most common questions we hear about the AC installation process.
How long does a typical AC installation take?
Most residential AC installation process projects take 4 to 8 hours. The exact time depends on the specifics of the job. A straightforward replacement can often be done on the lower end of that range. However, complex installations, such as those needing ductwork modifications or involving multi-zone systems, will take longer.
System type also plays a role. A single-zone ductless mini-split is often quicker to install than a full central air system. No matter the time it takes, we never rush quality. We are committed to doing it right the first time, ensuring your system will keep you cool for the next 15-20 years. For more insights into our approach, check out our Expert AC Installation Services.
What are the average costs for a new central AC system?
Budget is a major consideration, and we believe in transparency about costs. The total price of a new system is more than just the unit itself. The final investment includes the equipment, skilled labor, materials, permits, and any necessary ductwork or electrical upgrades.
Several factors affect the final price:
- Home Size: Larger homes require more powerful (and more expensive) systems.
- Efficiency (SEER Rating): Higher SEER units cost more upfront but deliver significant long-term savings on energy bills.
- Ductwork: Major repairs or replacement of your home’s ductwork can be a significant part of the cost.
- Electrical Upgrades: Some homes need electrical work to safely support a modern AC unit.
For general industry information, you can reference sources like Cost information from Angi, but every home is unique. We provide detailed, transparent estimates customized to your specific situation. Check out our AC Installation page to learn more.
Can I install an AC unit myself?
While we admire the DIY spirit, the AC installation process is complex and risky. We strongly advise against it for several key reasons:
- Safety Hazards: Installation involves high-voltage electricity, chemical refrigerants, and heavy equipment, posing significant risks of injury.
- Poor Performance: Without professional tools and knowledge for load calculation and refrigerant charging, the system will run inefficiently, leading to higher bills and more repairs.
- Code Violations: DIY installations rarely meet local building codes, which can cause issues when selling your home.
- Voided Warranties: Most manufacturers will void the warranty if the system is not installed by a licensed professional.
- Legal Issues: Handling refrigerants without EPA certification is illegal and harmful to the environment.
Trusting a professional is the safest and most effective way to protect your investment. We’ve been perfecting this craft since 1963 and have seen the costly results of shortcuts.
Your Guide to a Cool and Comfortable Home
A properly executed AC installation process is a smart investment in your home’s comfort, efficiency, and value. The quality of the installation affects performance every day for the life of the system.
Proper installation is the foundation for everything. A correctly sized, charged, and tested system provides consistent comfort and low energy bills. Shortcuts lead to higher costs, frequent repairs, and poor performance on the hottest days.
The long-term savings from professional installation are measurable. A professionally installed high-SEER unit operates at peak efficiency, significantly cutting your cooling costs, but only when installed with correct airflow, refrigerant levels, and sealed ductwork.
System longevity also depends on the installation. Mistakes like leaving moisture in the lines or improper brazing cause premature, expensive failures years later.
This is where professional expertise matters. Our EPA-certified technicians understand how every detail, from the Manual J load calculation to final commissioning tests, impacts long-term performance.
At Volpe Service Company, we’ve perfected our approach to the AC installation process since 1963. As a family-owned business, our reputation is built on doing the job right the first time with transparent communication and guaranteed results.
For a data-driven and guaranteed AC installation in New Jersey, trust the experts at Volpe Service Company to get the job done right. Schedule your AC installation in Chester, NJ today!