Why Smart Thermostat Installation is Worth Your Time
Smart thermostat installation can save up to 15% on heating and cooling costs and give you remote control over your home’s comfort. Most homeowners can complete the installation in 30-60 minutes with basic tools.
Quick Installation Overview:
- Turn off power at the circuit breaker
- Remove old thermostat and photograph the wiring
- Install new base and connect labeled wires
- Mount smart thermostat and restore power
- Connect to Wi-Fi and configure settings
Benefits extend beyond energy savings. They learn your schedule, adjust automatically, and can increase home value. Research shows 81% of homebuyers prefer homes with existing smart technology.
Most smart thermostats are compatible with over 85% of HVAC systems, but you must check yours first. The main factor is the C-wire, which provides continuous power. We’ll cover how to check for it.
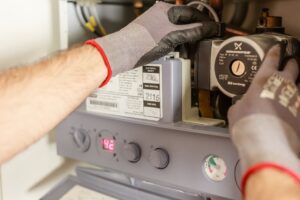
Some situations, like high-voltage systems or complex wiring, require a certified technician for safety and optimal performance.

Why Upgrade to a Smart Thermostat?
Imagine cooling your home from your phone before you arrive. That’s the convenience of a smart thermostat installation—complete climate control in your pocket.
Beyond convenience, smart thermostats offer up to 15% in energy savings, learn your lifestyle, provide remote control, boost home value, and deliver improved comfort that traditional thermostats can’t match.
The Main Benefits of a Smart Thermostat
Think of a smart thermostat as your home’s climate control assistant that gets smarter over time.
Energy cost reduction shows up on every utility bill. Smart thermostats learn your schedule to reduce energy use when you’re away. The Department of Energy confirms that proper thermostat management leads to significant savings.
Convenience via smartphone apps lets you adjust your home’s temperature from anywhere, eliminating the need to manually change settings on the wall.
Automated scheduling means the device learns your habits and creates an optimal schedule, adjusting temperatures for when you’re asleep, awake, or away.
Geofencing features use your phone’s location to automatically enter an energy-saving mode when you leave and prepare for your return.
Detailed energy usage reports give you insights into your energy consumption, helping you identify more opportunities to save.
How a Smart Thermostat Increases Home Value
Beyond monthly savings, smart thermostat installation is an investment in your home’s marketability.
Buyers now seek smart home appeal. A smart thermostat signals that a home is modern, efficient, and convenient. A Coldwell Banker survey found that 81% of buyers are more likely to purchase a home with smart tech already installed, making your thermostat a key selling point.
Modern technology integration shows your home is ready for a connected lifestyle, as it integrates with other smart devices to create an appealing ecosystem.
Before You Begin: Preparation and Safety
Proper preparation for your smart thermostat installation will save you time and frustration. This is your pre-installation checklist.

Preparing for Your Smart Thermostat Installation
Before touching any wires, ensure you’re set up for success.
First, perform the crucial HVAC system compatibility check. Most smart thermostats work with standard 24V systems but not high-voltage (120V/240V) or millivolt systems. Use the manufacturer’s online compatibility checker, often by uploading a photo of your current wiring.
Next, consider thermostat placement. It should be on an interior wall, away from direct sunlight, drafts, or heat sources to ensure accurate readings.
Check for strong Wi-Fi signal strength (2.4GHz network) at the thermostat’s location. You may need a Wi-Fi extender if the signal is weak.
For tools and materials, gather a screwdriver, level, wire labels (or masking tape), pliers, and your smartphone.
Essential Safety Precautions
Working with electrical components requires caution. The most important safety step is to turn off the power to your HVAC system at the circuit breaker.
Verify the power is off by trying to adjust your old thermostat. If nothing happens, you’re set. A voltage tester can also confirm there’s no current. This protects you and prevents damage to your HVAC system’s control board. If you encounter complex electrical issues, our guide on HVAC Electrical Issues Solutions can help you know when to call a professional.
Understanding Your System: The C-Wire and Compatibility
The C-wire is a common point of confusion, so let’s clarify.
What is a C-wire? The C-wire (or “common” wire) provides continuous low-voltage power to your smart thermostat, which needs more power than older models for its Wi-Fi and display.
Checking for a C-wire is simple. With the power off, remove your old thermostat’s faceplate and look for a wire in the “C” terminal. An unused C-wire may also be tucked into the wall.
If you don’t have a C-wire, many thermostats include a C-wire adapter (Power Extender Kit). This device connects at your furnace or air handler to create the necessary power connection.
Understanding low-voltage vs. line-voltage systems is key. Most homes have low-voltage (24V) systems compatible with smart thermostats. If you see thick wires or labels for 120V/240V, you have a high-voltage system that requires a professional.
Ductless mini-split systems often use smart AC controllers that are simple to install, plugging into an outlet and communicating via infrared or Wi-Fi.
To better understand your wiring, this guide on thermostat wire labels is a helpful resource.
Your Step-by-Step Guide to Smart Thermostat Installation
Alright, you’ve done your homework, gathered your tools, and confirmed compatibility. It’s time for the fun part: the actual smart thermostat installation! We’ll walk you through it, step by simple step.

1. Power Down and Remove Your Old Thermostat
This first step is crucial for a smooth installation.
Turn off HVAC at Breaker first. Ensure the power to your HVAC system is off at the circuit breaker. Test this by trying to adjust your old thermostat; it should not respond.
Now, remove the old faceplate. Most faceplates pull straight off, but some may have clips or hidden screws. Remove it gently without forcing it.
Next is the most important step: take a picture of the wiring. Before disconnecting anything, take a clear photo of the wire connections. This photo is your essential reference map.
Disconnect the wires after labeling them. Use the included labels or masking tape to label each wire according to its terminal (e.g., R, Y, G). Then, carefully disconnect them.
To prevent wires from falling into the wall, a common frustration, tape them to the wall or wrap them around a pencil.
Finally, remove the old backplate by unscrewing it from the wall. Keep the old thermostat handy in case you need it for troubleshooting later.
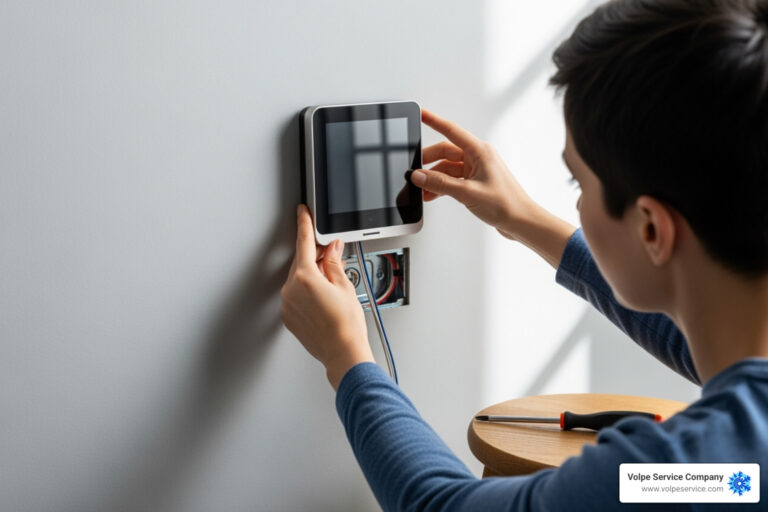
2. Mount the New Base and Connect Wires
Now it’s time to mount the new base and connect the wires for your smart thermostat installation.
Install New Backplate: Position the new backplate on the wall. Use the existing screw holes if possible, or mark and drill new pilot holes using the included hardware.
Use a Level: Ensure the backplate is level before screwing it to the wall. A crooked thermostat can be visually distracting.
Thread Wires Through Base: Pull the labeled wires through the central opening in the new backplate before securing it to the wall.
Now, connect the wires. Match labels to terminals using your photo as a guide. Connect each labeled wire to the corresponding terminal on the new base (e.g., R to R, Y to Y). If you have a single R wire, it typically connects to the Rc terminal.
Secure connections are vital. For push-in terminals, insert the wire until it clicks. For screw terminals, tighten the screw securely around the wire. Gently tug each wire to confirm it’s secure.
You likely won’t need the jumper wires (e.g., connecting R and Rc) from your old thermostat, as new models handle this internally.
Once all wires are connected, secure the backplate to the wall. For more details on professional installation, see our AC Installation Step by Step Process.
3. Attach the Smart Thermostat and Power Up
You’re almost finished with your smart thermostat installation. It’s time to attach the faceplate and restore power.
Attach the New Faceplate: Gently push excess wires back into the wall. Align the new faceplate with the backplate and press firmly until it clicks into place, sitting flush against the wall.
Restore Power at the Breaker: Go to your circuit breaker and flip the HVAC breaker back to the “on” position.
Initial Boot-up Sequence: The thermostat will now power on. It may take a few minutes to boot up and charge its internal battery, displaying a logo or loading screen.
What to do if it doesn’t turn on: If the thermostat doesn’t turn on, don’t panic. Follow these troubleshooting steps:
- Double-check the power: Ensure the breaker is fully in the “on” position and that all related HVAC breakers are on.
- Verify your connections: Make sure the faceplate is securely attached to the backplate and that all wires are firmly seated in their terminals.
- Check your HVAC panels: Ensure all access panels on your furnace or air handler are closed securely, as open panels can trigger a safety switch that cuts power.
- You may have blown a fuse in your furnace control board during installation. If you suspect this, it’s best to call a professional.
Setup, Configuration, and Troubleshooting
With the hardware installed, it’s time to configure your new smart thermostat.

Connecting to Wi-Fi and the Companion App
This step connects your thermostat to your home network.
- On-screen setup prompts will guide you through the process.
- Connect to your Wi-Fi network by selecting it from the list. Most smart thermostats require a 2.4GHz connection.
- Download the companion app for your thermostat from your phone’s app store. The thermostat screen may provide a QR code to help.
- Create an account and pair the device through the app, usually by scanning a QR code or entering a code from the thermostat’s screen.
Best Practices for Configuration
Configure your thermostat for optimal comfort and savings.
- Set initial schedules: Program basic temperature settings for when you are home, away, and asleep. The thermostat will learn from this starting point.
- Enable learning features: Allow the thermostat to learn your habits. After about a week of observing your manual adjustments, it will begin to create schedules automatically.
- Set up geofencing: Use your phone’s location to automatically switch to an energy-saving mode when you leave home and return to a comfortable temperature upon your arrival.
- Use vacation mode for extended trips. This maintains a safe temperature to protect your home while saving significant energy.
- Customize preferences: Use the app’s energy reports to fine-tune your settings for more savings. For more tips, see our guide on 7 Easy Ways to Increase the Efficiency of Your HVAC Unit.
Troubleshooting Common Installation Issues
Even a smooth smart thermostat installation can have issues. Most are easy to fix.
- Thermostat won’t turn on: Re-check the circuit breaker, ensure all wire connections are secure, and verify your C-wire adapter (if used) is installed correctly. A blown fuse may require professional help.
- Wi-Fi connectivity problems: Double-check your password. Ensure the thermostat is close enough to the router and connected to the 2.4GHz network. Restarting your router and thermostat can also help.
- Incorrect temperature readings: Check for drafts or heat sources (sunlight, lamps) near the thermostat. If the issue persists, you may be able to calibrate the temperature in the device settings.
- HVAC system not responding: Re-check your wiring against the photo of your old setup. Confirm your thermostat is compatible with your HVAC system. Ensure all furnace/air handler access panels are securely closed, as this can trigger a safety shutoff.
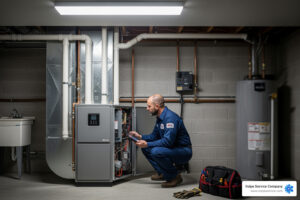
If these steps don’t work, call a professional. Volpe Service Company specializes in HVAC System Troubleshooting and can resolve the issue.
Frequently Asked Questions about Smart Thermostat Installation
Here are answers to common questions about smart thermostat installation.
How long does a DIY smart thermostat installation take?
Most DIY installations take 30-60 minutes. The time can vary based on your experience and wiring complexity. Physical installation is quick; software setup and configuration often take the most time.
What are common mistakes to avoid during smart thermostat installation?
Common mistakes include: forgetting to turn off power, not photographing the original wiring, connecting wires incorrectly, and skipping the HVAC compatibility check. Taking your time and labeling wires properly can prevent most issues.
When should I hire a professional for installation?
You should hire a professional for your smart thermostat installation if you have a high-voltage system, need a C-wire installed and are uncomfortable doing it yourself, are generally uncomfortable with wiring, or if DIY troubleshooting fails. A qualified technician ensures correct installation and optimal performance. Learn the Professional HVAC Services Signs to choose the right contractor.
When in Doubt, Call the Professionals
While many homeowners can handle a smart thermostat installation, some situations are best left to professionals for safety and peace of mind.
If you encounter incompatible or complex wiring, or if you need a C-wire run from your furnace, it’s time to call an expert. This work often requires navigating electrical panels and is best handled by a technician. Many people also simply prefer the guarantee of an expert installation to protect their HVAC investment and ensure their family’s comfort.
Since 1963, the certified technicians at Volpe Service Company have handled every type of HVAC challenge. We don’t just install your smart thermostat; we optimize it for your specific system. This ensures maximum comfort and energy savings from day one, backed by warranties for long-term protection.
Working with us means investing in expertise to handle any issue and ensure proper system integration.
For expert assistance with your HVAC Contractor Parsippany NJ needs, contact our team. We’re here to help make your home more comfortable and efficient.